ChatGPT Integration
This guide explains how to integrate your Gateway-generated API with ChatGPT by creating a custom GPT with actions.
Prerequisites
Before integrating with ChatGPT, ensure you have:
- A running Gateway API with a publicly accessible endpoint
- OpenAPI/Swagger documentation available at your API endpoint (e.g.,
https://your-api.com/swagger/) - A ChatGPT Plus subscription to access the GPT Builder
- Necessary authentication information if your API requires it
Creating a Custom GPT with Gateway API Actions
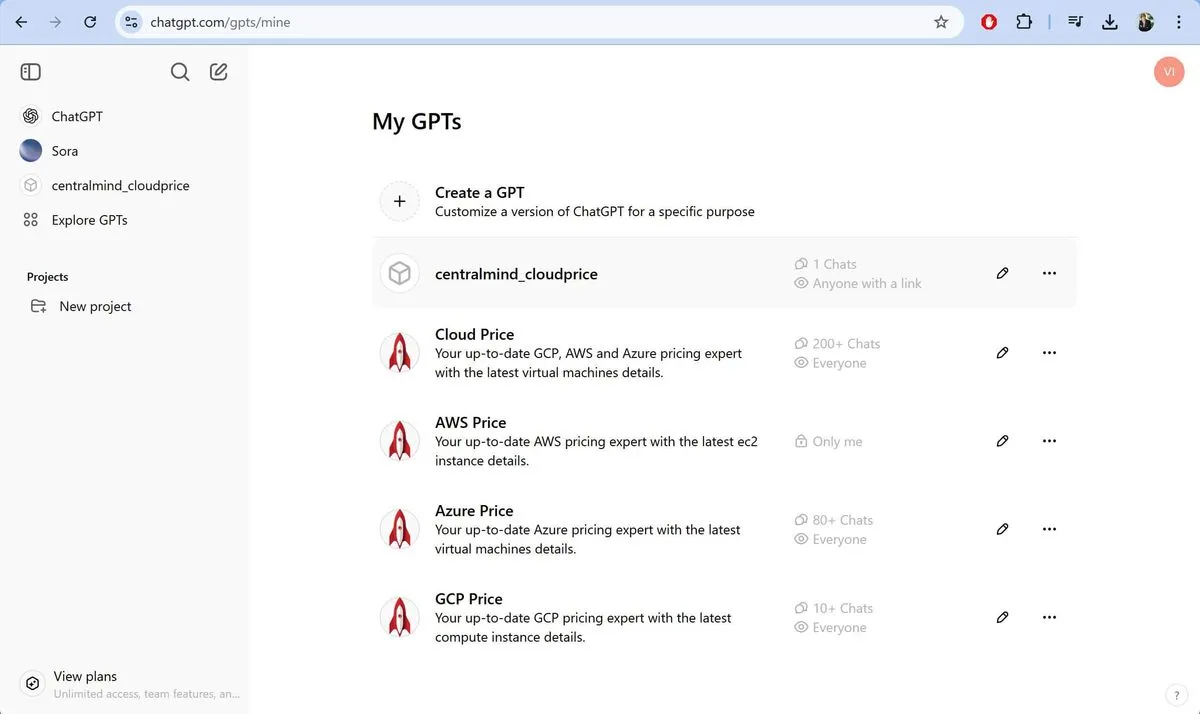
Step 1: Access GPT Builder
- Log in to your ChatGPT Plus account
- Navigate to GPT Builder at https://chatgpt.com/gpts/mine
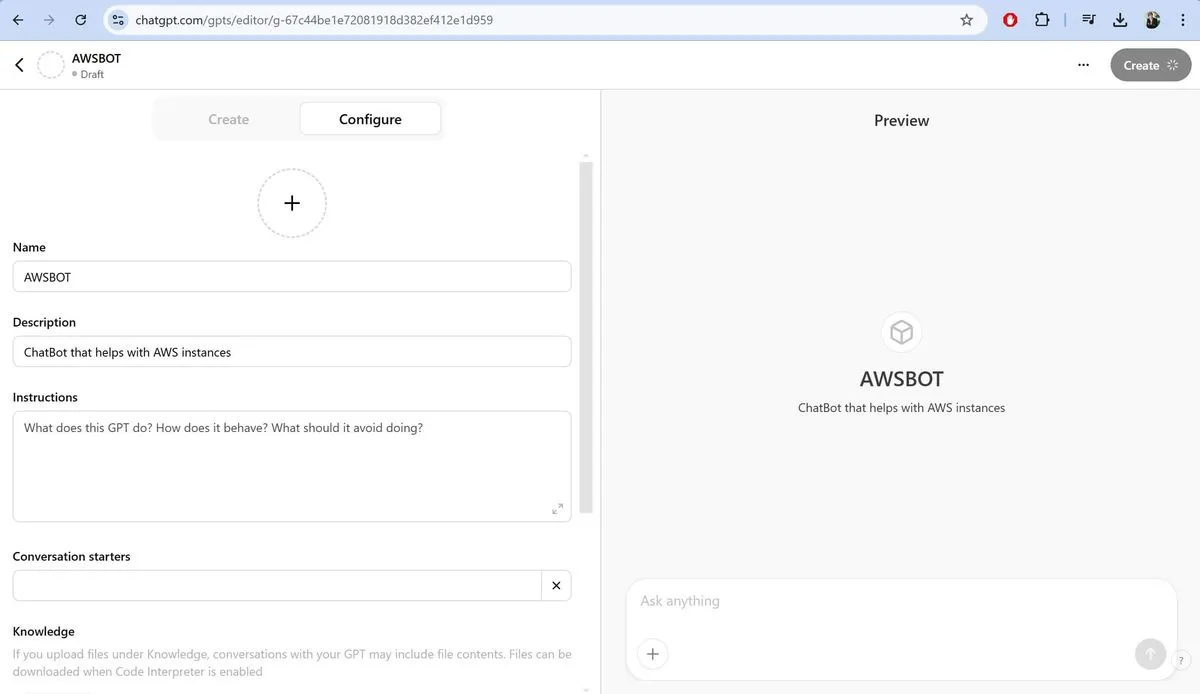
Step 2: Set Up Your Custom GPT
- Click “Create new GPT”
- Fill in the basic information:
- Name: Choose a name related to your API’s purpose
- Description: Explain what your API does and how users can interact with it
- Instructions: Provide detailed guidance on how the GPT should use your API
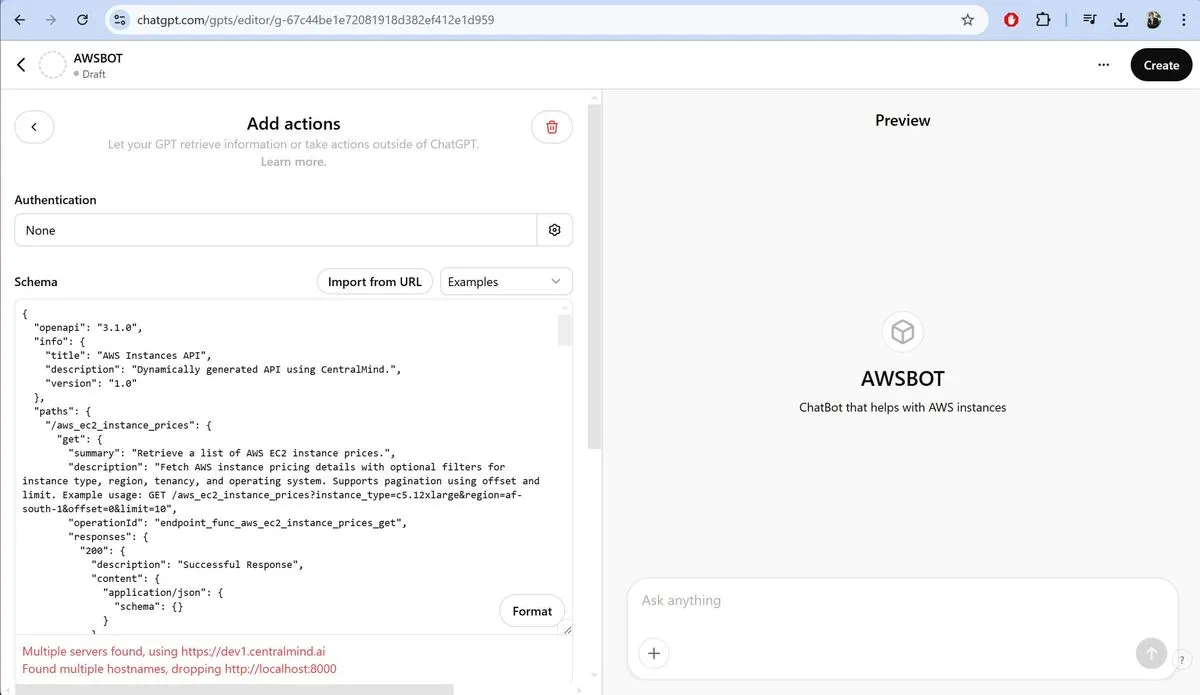
Step 3: Add Actions to Connect to Your Gateway API
-
In the GPT Builder interface, navigate to the “Actions” tab
-
Click “Create new action”
-
Enter a name for your action that describes what it does
-
For “Authentication,” select the appropriate method:
- “None” if your API is publicly accessible
- “API Key” if your API uses key-based authentication
- “OAuth” for OAuth authentication
Step 4: Configure OpenAPI Specification
-
Select “OpenAPI schema” for Schema type
-
Enter your Gateway API’s OpenAPI URL (e.g.,
https://your-gateway-api.com/openapi.jsonorhttps://your-gateway-api.com/swagger/)Alternatively, you can:
- Click “Import from URL” and enter your OpenAPI URL
- Copy and paste the OpenAPI JSON directly into the schema field
Step 5: Customize Privacy and Settings
- Review the endpoints that will be accessible to the GPT
- Configure which operations your GPT can perform
- If required, set up authentication details:
- For API Key authentication, specify the header name (e.g.,
X-API-KEY) - Enter placeholder values that users will need to provide
- For API Key authentication, specify the header name (e.g.,
Step 6: Save and Test Your Custom GPT
- Click “Save” to create your action
- Test your API connection with example queries
- Make adjustments to the instructions as needed to optimize the interaction
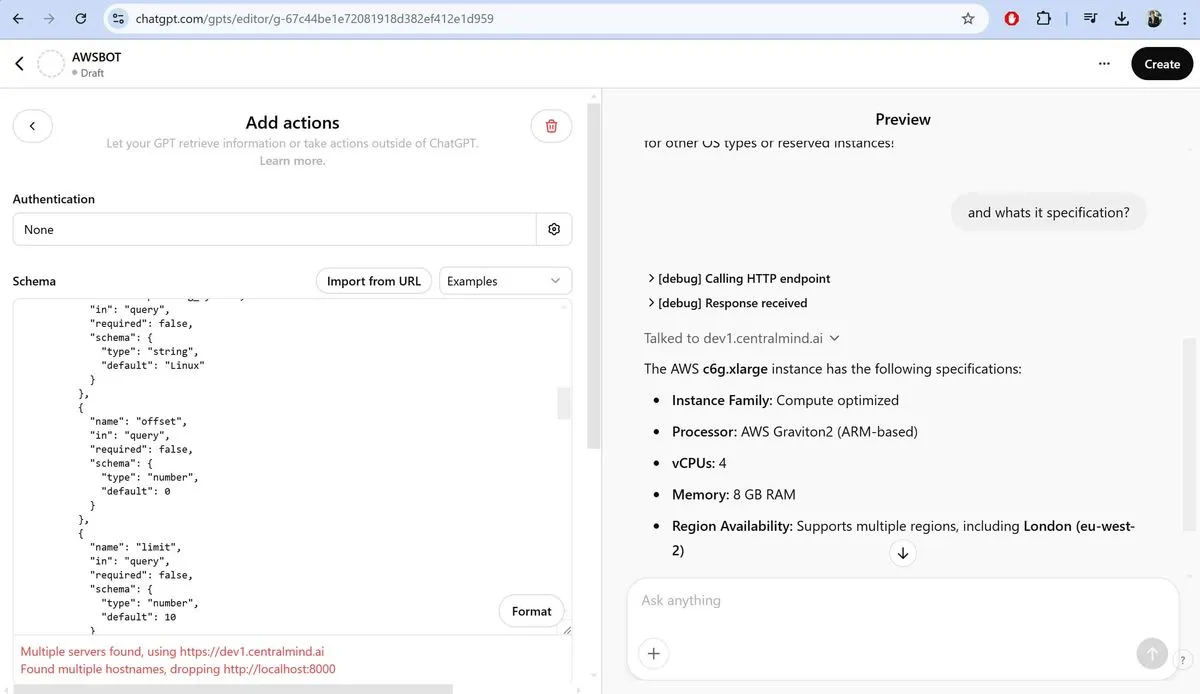
Example Conversation Flow
Here’s an example of how a conversation with your Gateway API-enabled GPT might look:
User: “Can you show me pricing for instance c6g.2xlarge and specification?”
Troubleshooting
If you encounter issues with your ChatGPT integration:
- API not accessible: Ensure your API is publicly accessible from the internet
- Authentication errors: Verify your authentication details are correctly configured
- Schema errors: Check that your OpenAPI specification is valid and properly formatted
- Rate limiting: Consider implementing rate limiting on your API to prevent abuse
Publishing Your Custom GPT (Optional)
If you want to share your GPT with others:
- Go to the “Configure” tab and select visibility settings
- Add appropriate usage instructions and examples
- Click “Publish” to make your GPT available according to your selected visibility
[IMAGE PLACEHOLDER: Screenshot of the publishing interface with visibility options]
For more details on creating custom GPTs, refer to the OpenAI GPT Builder Documentation.